Getting started with Sublime Text (and becoming more productive)
I’ve been trying to convince a few of my colleagues of the wonders of Sublime Text for a while, and I’m hoping this small guide helps make the switch from any previous editors out there. Sublime’s combination of autocompletion, command bar, extensibility, speed and rich features is really hard to find in any other editor. I’m not an IDE guy, so I’ve tried a few code editors starting from my first website in Notepad, continuing in Notepad++, Delphi for PHP, Coda & Espresso, but Sublime is way better than anything I’ve worked in before.

This is my specific Sublime setup so if something doesn’t suit you, feel free to use the setting that you believe would work best for you. For example, I don’t like the tabs, and instead prefer a list of open files on the left.
Installation
First, download Sublime Text. Version 3 is still in Beta, but I’ve been using it daily for the past couple of months with no hiccups, it’s quite stable.
Plugins & Settings
The first thing you want to do is to install Sublime Package Control – an open source manager for your Sublime plugins, ran by Will Bond. The installation consists of 2 simple steps – just head to the Package Control page to install.
Once you have the Package Control installed, next thing we’re going to tackle is the visual aspect of Sublime. A lot of people find the default interface slightly “ugly”, so we’re going to install a custom theme using the convenient Package Control. Use Cmd + Shift + P to open the Sublime menu, and from there type install. This will bring up the Package Control option. Hit enter and wait for the packages to load, then type theme soda (Soda is probably the most popular Sublime Text theme). After that’s done, open Sublime’s User preferences (on Mac, you can find them under Sublime Text > Preferences, on Windows and Linux you can find them under Tools > Preferences). If there’s already some contents there, just add "theme": "Soda Dark.sublime-theme" to the list – if the file is empty, you can copy/paste the following:
{
    "theme": "Soda Dark.sublime-theme"
}
Once you save, restart Sublime to get your new look. You an also replace Dark with Light to get a light, slightly OS X-ish look.
My complete list of settings is below, if you’d like to try it out.
{
"auto_complete_commit_on_tab": true,
"caret_style": "phase",
"close_windows_when_empty": false,
"color_scheme": "Cache/Color Scheme - Default/Monokai.tmTheme",
"default_line_ending": "unix",
"find_selected_text": false,
"font_face": "Droid Sans Mono",
"font_size": 12,
"highlight_line": true,
"ignored_packages": ["Vintage"],
"move_to_limit_on_up_down": true,
"open_files_in_new_window": false,
"overlay_scroll_bars": "enabled",
"scroll_past_end": true,
"show_full_path": false,
"theme": "Soda Dark.sublime-theme",
"trim_trailing_white_space_on_save": true,
"use_simple_full_screen": true,
"word_wrap": "true"
}
The settings’ names are fairly descriptive, so just customize them to your liking. I’ve also turned off tabs from View > Hide tabs and turned on the display of open files in sidebar by clicking View > Sidebar > Show Open Files.
Next, for those who got used to doing some Zen coding (the tools are now branded as Emmet), you can use Cmd + Shift + P to bring up the Sublime commands bar again and type install package. Type emmet and install the plugin.
I also have Hayaku, which allows you to convert posabs to position: absolute; with just a hit of the tab key. Have a look at the Hayaku page to see other ways it can save you time. You can install it the same way through Package Manager as any other plugin.
SublimeAllAutocomplete provides you some neat autocomplete with matches from all open files. It’s very convenient when you’re working with multiple files at the same time.
SublimeCodeIntel is another great tool, helps with autocompletion and code hints. Very useful.
I’ve also installed Hasher, Inline Calculator, ApacheConf, nginx, LESS and Sublime Finder, but you may also find Sidebar Enhancements, Sublime Linter, Bracket Highlighter, HTML5 and jQuery useful, to name a few. You can also browse through the list and see if you find anything that might help you with your day-to-day tasks.
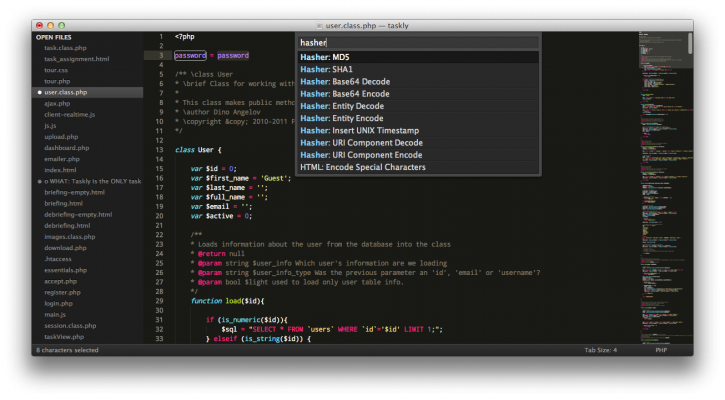
Many plugins provide keyboard shortcuts when installed and nearly all provide easy to access entries in the Sublime command bar. So for example if you downloaded the Hasher plugin, you can open the Sublime menu by Cmd + P and type hasher – it will list all of the functionality offered by that plugin.
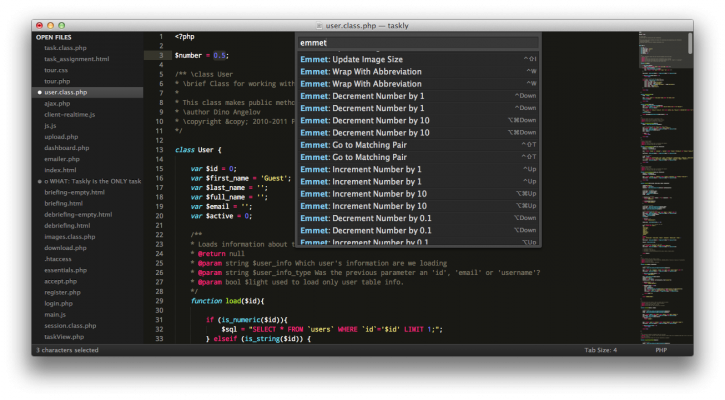
For plugins that do provide a keyboard shortcut, you find them out by doing the same – open the command bar and type the plugin name (say emmet). It will provide a list of commands and the shortcut for many of them will be listed on the right side of the list.
This is actually a good way to get familiar with Sublime’s shortcuts. Just go through the menus and see the options it offers and if it has a keyboard shortcut, try to remember it. For example, one of the shortcuts I use most often is Cmd + / which quickly comments out a line (or switches it back to a normal line if you press again).
Setting up your project
So now that we’ve prepped up Sublime, it’s time for setting up our project. Let’s say you have your website in ~/websites/personal-website. In Sublime, click on Project > Add Folder to Project… and select your folder – this will open a list of all files in the sidebar. Now do Project > Save Project As…. That will make it very easy to switch between projects and files in the future. If you are working on multiple projects, you can easily reopen a project (along with all your open files and settings) by going to Project > Open Recent.
Once you’ve done that, switching between files in your project is a lot easier. Just use Cmd + P and type the name of the file. The best part is, you don’t have to type the complete file name, since Sublime uses fuzzy matching. For example, if your filename is my-test-file.js you can type mtfjs and the file will show up in the menu right away.
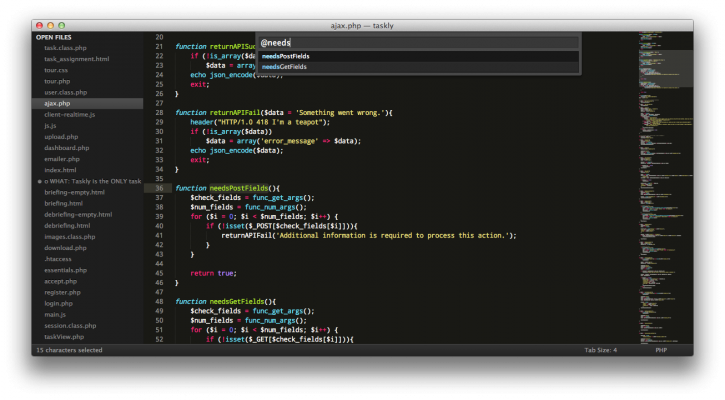
But Cmd + P doesn’t end there. Let’s say you want to go to a specific line in the current file, just type :222 (with the leading colons) and hit enter – you are instantly taken to line 222 in the file. Or, to combine this with the example above, you can type mtfjs:222 and it will take you to line 222 in my-test-file.js. Use @ to quickly jump to declared variables or functions.
That’s about it for this short guide. I know I’ve saved a lot of time personally with this editor and I hope this guide will help you be more productive as well.
Of course, this is not all there is to Sublime Text, and there are many other things you can add or extend sublime with (eg. be able to run it from the Terminal) so if you find yourself wishing that Sublime did something – there’s a good chance it’s already available online, you just need to look for it.
If you find any errors, or have any suggestions or feedback about this article, please let me know @theangelov.